CS 100 HW 5: Web Pages and Encryption
- Due: 5:00 pm Friday 11/6/2014
- Submit to Blackboard by deadline
- May also submit hard copy for extra feedback
CHANGELOG: Empty
Table of Contents
- 1. Instructions
- 2. Basic Encryption
- 3. Problem 1: Basic Caesar Cipher
- 4. Caesar Cipher Python
- 5. Problem 2: Cracking the Caesar Cipher
- 6. Problem 3: Vigenere Cipher
- 7. Set up your Personal Web Site
- 8. Get a Text Editor for Web Pages
- 9. Problem 4: Create a Personal Web Page in HTML
- 10. Communicating with the
masonserver - 11. PuTTY On Windows
- 12.
sftpOn Mac OS X - 13.
sftpCommands - 14. Problem 5: Transfer your Personal Web Page to the
masonserver
1 Instructions
- Complete the problems in each section below which is labelled Problem
- Sections that are not labelled Problem are designed to help you solve the HW problems so make sure to read the information contained there.
- This is an individual assignment: you must do your own work and may not share or compare answers with other students. If you are struggling, ask questions on Piazza, seek help from the TA or professor, and review the class notes and tutorial links provided.
- Do your work in an acceptable electronic format which are
limited to the following
- A Microsoft Word Document (.doc or .docx extension)
- A PDF (portable document format, .pdf)
You may work in other programs (Apple Words, Google Docs, etc.) but make sure you can export/"save as" your work to an acceptable format before submitting it.
- Submit your work to our Blackboard site.
- Log into Blackboard
- Click on CS 100->HW Assignments->HW 5
- Press the button marked "Attach File: Browse My Computer"
- Select your file
- Click submit on Blackboard
- If you want verbose feedback print a copy of your assignment and submit it in class on the due date. You must still submit an electronic version.
- Submit 2 files to our Blackboard site.
- Log into Blackboard
- Click on CS 100->HW Assignments->HW 5
- Press the button marked "Attach File: Browse My Computer"
- Select your HW Writeup file (
.doc .docx .pdf .html .txtonly) - Again: Press the button marked "Attach File: Browse My Computer"
- This time select your
hw5.htmland attach it. - Click Submit
- Make sure the HW Writeup has your information in it:
CS 100 HW 5 Writeup
Turanga Leela tleela4 G07019321
2 Basic Encryption
In class we studied two very basic symmetric encryption techinques, the Caesar Cipher and the Vigenere Cipher. We covered these during Week 7-2 and 8-1. The next two problems will have you do a little encoding and code breaking.
Problems 3-5 use the following table of number to letter
correspondences. Notice the underscore ( _ ) is the last character
so there are 27 letters in this alphabet numbered 0 to 26. Underscore
will be used in place of spaces in messages
| # | Char | # | Char |
|---|---|---|---|
| 0 | A | 13 | N |
| 1 | B | 14 | O |
| 2 | C | 15 | P |
| 3 | D | 16 | Q |
| 4 | E | 17 | R |
| 5 | F | 18 | S |
| 6 | G | 19 | T |
| 7 | H | 20 | U |
| 8 | I | 21 | V |
| 9 | J | 22 | W |
| 10 | K | 23 | X |
| 11 | L | 24 | Y |
| 12 | M | 25 | Z |
| 26 | _ |
For example the word HOMER_BOWLS would be converted to numbers as
7 14 12 4 17 26 1 14 22 11 18
3 Problem 1: Basic Caesar Cipher
Use the Caesar cipher to encrypt the following message using the given key.
- Message:
EAT_MY_SHORTS - Key:
14
Decrypt the following message using the given key.
- Message:
XLBRP - Key:
11
What to put in your HW Write-up
- Put your encrypted and decrypted messages in your write-up
- Make sure to show some work so you can garner some partial credit in case things go wrong and your final answer is a little off
4 Caesar Cipher Python
The Python code below has functions to do both encryption and
decryption of Caesar ciphered messages. It is demonstrated on the
message AY_CARUMBA. To encrypt call the
ceasear_encrypt(message,key) function
plain = "AY_CARUMBA"
key = 14
encrypted = caesar_encrypt(plain,key)
To decrypt, use the caesar_decrypt(message,key) function as in
decrypted = caesar_decrypt(encrypted,key)
Both encrypted and decrypted messages can then be printed as in
print("encrypted: "+encrypted)
print("decrypted: "+decrypted)
The full code to support the Caesar cipher is below. You can use this code the check your answers for Problem 3 and will need to use it for Problem 4.
# Caesar cipher python functions to encode and decode
# Valide letters are A-Z and _

# 27 letters: A-Z plus _
numbers_letters = [ (0,"A"), (1,"B"), (2,"C"), (3,"D"), (4,"E"), (5,"F"), (6,"G"), (7,"H"),
                    (8,"I"), (9,"J"), (10,"K"), (11,"L"), (12,"M"), (13,"N"), (14,"O"), (15,"P"),
                    (16,"Q"), (17,"R"), (18,"S"), (19,"T"), (20,"U"), (21,"V"), (22,"W"), (23,"X"),
                    (24,"Y"), (25,"Z"), (26,"_"),]
alphabet_size = len(numbers_letters)

# Convert a number to a letter
def number2letter(num):
    for (n,l) in numbers_letters:
        if n==num:
            return l
    raise Exception("No letter for number "+str(num))

# Convert a letter to a number
def letter2number(let):
    for (n,l) in numbers_letters:
        if l==let:
            return n
    raise Exception("No number for letter "+str(let))

# Encrypt some text according to the caesar cipher using the give key
def caesar_encrypt(plain_text, key):
    encrypted_letters = []
    for plain_letter in plain_text:
        plain_number = letter2number(plain_letter)
        encrypted_number = (plain_number + key) % alphabet_size
        encrypted_letter = number2letter(encrypted_number)
        encrypted_letters.append(encrypted_letter)
    encrypted_text = "".join(encrypted_letters)
    return encrypted_text

# Decrypt some text according to the caesar cipher using the give key
def caesar_decrypt(encrypted_text, key):
    plain_letters = []
    for encrypted_letter in encrypted_text:
        encrypted_number = letter2number(encrypted_letter)
        plain_number = (encrypted_number + alphabet_size - key) % alphabet_size
        plain_letter = number2letter(plain_number)
        plain_letters.append(plain_letter)
    plain_text = "".join(plain_letters)
    return plain_text

# Demonstration of using the caesar_encrypt() and ceasar_decrypt() functions
plain = "AY_CARUMBA"
key = 14
encrypted = caesar_encrypt(plain,key)
decrypted = caesar_decrypt(encrypted,key)
print("plain:     "+plain)
print("encrypted: "+encrypted)
print("decrypted: "+decrypted)

# Try to decrypt this text. The secret key is between 0 and 26
secret_message = "L_XSKAEHKGFKSDANXSAFSKHJAFZYAXDW"
5 Problem 2: Cracking the Caesar Cipher
At the bottom of the python code above is a secret message.
# Try to decrypt this text. The secret key is between 0 and 26
secret_message = "L_XSKAEHKGFKSDANXSAFSKHJAFZYAXDW"
Copy all the python from the previous section into a file
called caesar.py and then write a loop at the bottom to try every
possible key in the Caesar cipher to decrypt the secret_message..
Use the function caesar_decrypt(encrypted_text,key) and print the
strings it returns in the loop. Many of them will look like gibberish
such as decoding using the keys 1 and 2 which should give the messages
key: 1
decrypted: KZWRJ_DGJFEJRC_MWR_ERJGI_EYX_WCV
key: 2
decrypted: JYVQIZCFIEDIQBZLVQZDQIFHZDXWZVBU
However, one of the keys should give a decrypted message that looks like actual English and it is the answer. Print out which key is used to try the decryption so you'll be able to determine the secret key for future use.
You can do this by hand if you like, but it's much faster to use Python in a loop to perform this brute force attack to try every possible key.
What to put in your HW Write-up
- Show the python code for the loop you used to do your brute force attack and try every possible key
- Show the key that you determined decrypted the mesage
- Show the decrypted message text (Hint: it's the setting for America's longest running primetime series)
6 Problem 3: Vigenere Cipher
Food Corp would like to determine the secret ingredient to the Flaming Moe, a popular beverage at a local food establishment. Unfortunately, the proprietor, Moe, is not willing to sell the recipe. Food Corp was able to intercept an encrypted messasge which they believe contains the secret ingredient. They know that Moe favors using the Vigenere cipher and know from his Facebook page that the secret key is likely to be the name of one of his two most stalwart customers.
Crack the secret message below by decrypting the Secret Message using one of the two keys below. Only one key will produce a meaningful message which will be the secret ingredient to the Flaming Moe.
- Secret Message:
JBFKYGFJVKW - Potential Key 1:
BARNEY - Potential Key 2:
HOMER
What to put in your HW Write-up
- Show the key that you determined decrypted the mesage
- Show the decrypted message text (Hint: it's not love)
- Make sure to show some work so you can garner some partial credit in case things go wrong and your final answer is a little off
7 Set up your Personal Web Site
Every student at GMU web space on the mason server to set up a
personal web site. This is very useful for advertising yourself to
potential employers and can be generally fun. Problems 1 and 2
center around setting up the your personal site. You will need to
perform several steps.
- Create a personal web page on your local computer which is an HTML file along with any pictures you want to use (Problem 1)
- Get a communications tool that allows your computer to talk to the
masonserver. - Set up your web directory on
masonand transfer your personal web page and pictures from your personal computer to themasonserver. (Problem 2)
The sections preceding Problem 1 walk you through the process of creating an HTML page on your personal computer.
The section preceding Problem 2 walks you through the steps to
transfer the page to the mason web server.
Make sure to follow the instructions closely to finish the next two problems.
8 Get a Text Editor for Web Pages
An web page is as simple as a text document with some code in a
specific display language, the Hyper Text Markup Language, HTML for
short. To create a web page on your computer, choose a sensible
location (folder) such as Desktop/cs100/hw5/ and create a text file
there. Unfortunately, Windows 7-10 and Mac OS X lack a good text
editor for web pages so in this section gives instructions on how to
download and install Sublime Text Editor which is available on all
major computing platforms and does a good job of editing HTML pages.
Installing Sublime Text 2 on Mac OS X
Video Tutorial for Sublime Text 2 on Mac OS X. The basic steps are as follows.
- Visit http://www.sublimetext.com/2 and download the Mac OS X version of the program
- When the download completes, open the
Sublime Text Build.dmgfile by clicking in the browser download or finding the downloaded file in Finder - When a window opens showing the contents of the DMG, drag the
Sublime Texticon into theApplicationsfolder. - Wait for the installation to complete, then search for
Sublime Textin Applications or Spotlight to run the program.
Installing Sublime Text 2 on Windows
Video Tutorial to install Sublime Text 2 on Windows. The basic steps are as follows.
- Visit http://www.sublimetext.com/2 and download the Windows version. Most folks with newer computers should be able to use the 64-bit version but if you attempt to install it and receive errors, try downloading the 32-bit version instead.
- When the download completes, open the
Sublime Text 2 Installfile by clicking in the browser download or finding the downloaded file on your Desktop/Downloads folder. - Follow the installation instructions; the default options such as install location should be fine.
- When installation is complete, search for
Sublim Text 2in your programs folder or using the Windows search functionality to start it.
Other Text Editor Options
If you are already acquainted with a text editor you like, don't feel obliged to use Sublime. Windows Notepad will do in a pinch though it does not support HTML editing very well. Mac OS X TextEdit is not a good choice at it is difficult to get it to edit plain text.
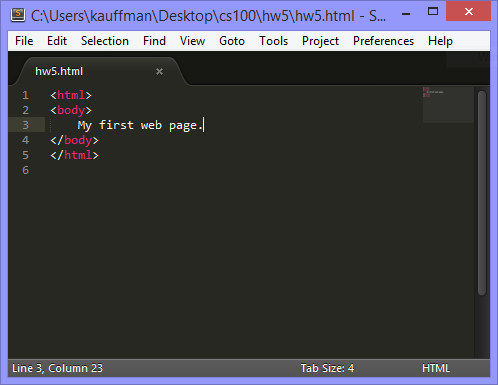
Creating a Simple Web Page with Sublime Text Editor
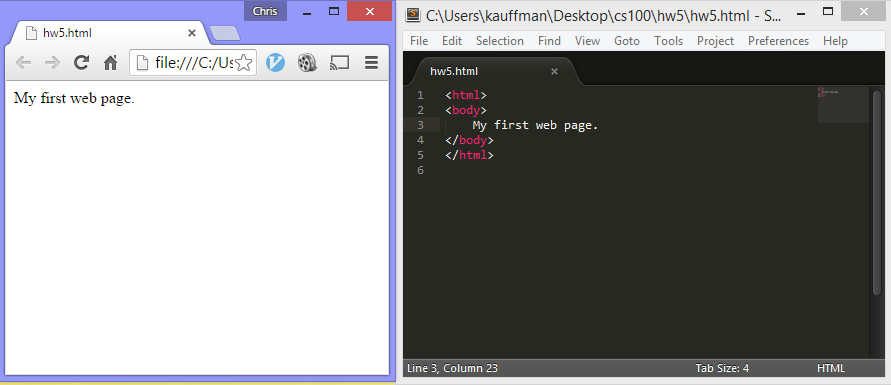
Open Sublime Text Editor which should display an empty text file.
Immediately save the file somewhere sensible such as your
Desktop/cs100/hw5/ folder. Name the file hw5.html when you
save it. This will cause Sublime recognize the file as an HTML
document and start applying colors to certain special elements.
File Extensions Note: make sure that you save the file with the
extension .html so that it is treated as a web page. Windows and Mac
have a tendency to hide the .html part so it can be hard to tell
exactly what the extension is sometimes. If have trouble, you should
adjust your system settings to show the file extensions using one of
the following sets of instructions.
- Show file extensions in Windows 7
- Show file extensions in Windowd 8
- Show file extensions in Windows 10
- Show file extensions in Mac OS X
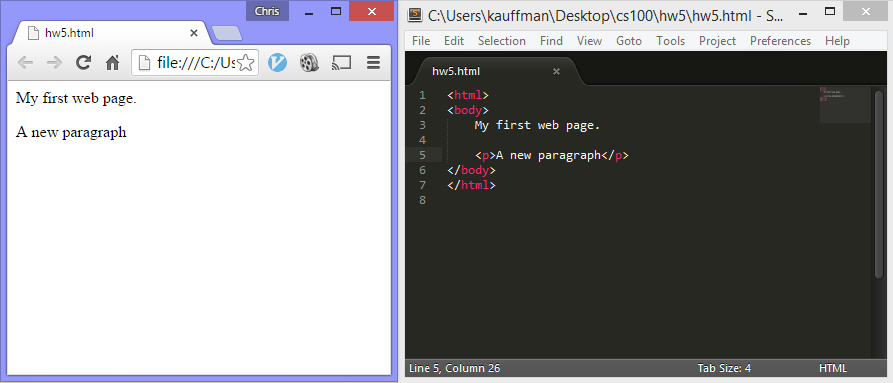
Type the following text into the HTML document.
Save your hw5.html file in Sublime. Then find the file in the
folder where you stored it.
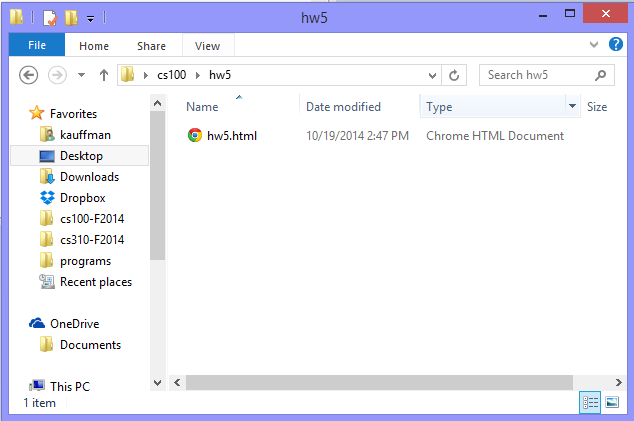
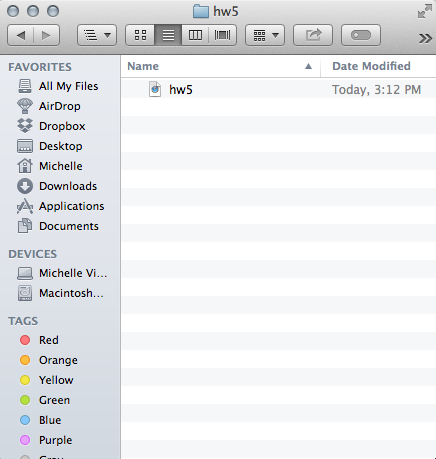
Double clicking it should open the file in a web browser.
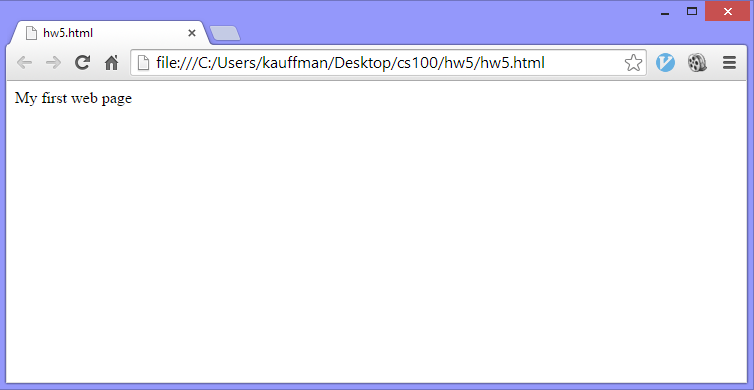
A good idea is to keep Notepad open with your HTML in it and your browser open to render of the HTML next to it. As you make changes to the HTML, save the file then click the Refresh button in the web browser and you will see the changes in the web page.
9 Problem 4: Create a Personal Web Page in HTML
Create a personal web page in a file called hw5.html.
For full credit your web page should have all of the following things in it
- A proper title in the title bar using the
<title>tags - Your full name and major
- A picture of yourself, preferably one in which your face is
visible, you are fully clothed, and that is an appropriate
size. Make sure that your picture is in the same local folder as
the
hw5.htmlor you won't be able to see it. - A short paragraph on your interests ("When I'm not studying I like to…", "I really enjoy … and …").
- A list of 3 things you have learned so far in CS 100. This list
must be a numbered list coded in HTML using the
<ol>tag. - A link to the CS 100 lectures slides. Visit the page and copy the
link. Write the text
CS 100 Lecture Slidesfor the clickable link text for this link. - A link to another student's HW 5 page. This means you'll have to
find out the web address of someone else's
hw5.htmlonce they have it online so that your HTML page links to theirs. You may need to come back to this step after other students complete the HW. Make sure to include the name of the other student's page as the clickable link text. For exampleChris Kauffman's personal web page. - A link to Prof. Kauffman's Home Page which is here:
https://cs.gmu.edu/~kauffman/. The link should have the the
following text associated with it
Recent research has shown beard loss increases the computer power of professors.
so that clicking that text directs one to Prof. Kauffman's page. This text will potentially influence internet search engine results so that a search for those words may show the linked web page as a top hit (a Google Bomb).
We will discuss most of the above concepts in HTML during lecture. The lecture notes and code for those discussions will be on the lecture slides page so review the slide forget to do something with HTML.
What to put in your HW Write-up
- Once you have your
hw5.htmlfinished, show it in the web browswer and take a screenshot of it. Put the screeshot of your HW Write-up. - When submitting your write-up, also submit your
hw5.htmlfile to Blackboard.
10 Communicating with the mason server
In order to move files on your local computer to the mason server,
we will use some simple programs that utilize the Secure File
Transfer Protocol called SFTP for short. An older protocol was
called just FTP as it did not use encryption to ensure the connection
was secure. The protocol is a way for one computer to talk to another
computer, similar to the Internet Protocol, however SFTP includes the
ability to issue commands like "I have a file, put it on the server"
or "The server has a file, get it from the server and put it on my
computer" and "Server, make a directory (mkdir) for me to put
files in."
The following instructions give an overview of how to use SFTP on Windows and Mac. After these individual sections, the next section outlines the commands you run in case you get into trouble and need to understand them more.
11 PuTTY On Windows
Windows does not come with a built in SFTP tool so you'll need to get one. Download and install the PuTTY communication tools. The download link is here: http://www.chiark.greenend.org.uk/~sgtatham/putty/download.html
Look for the link title A Windows installer for everything except PuTTYtel and click it
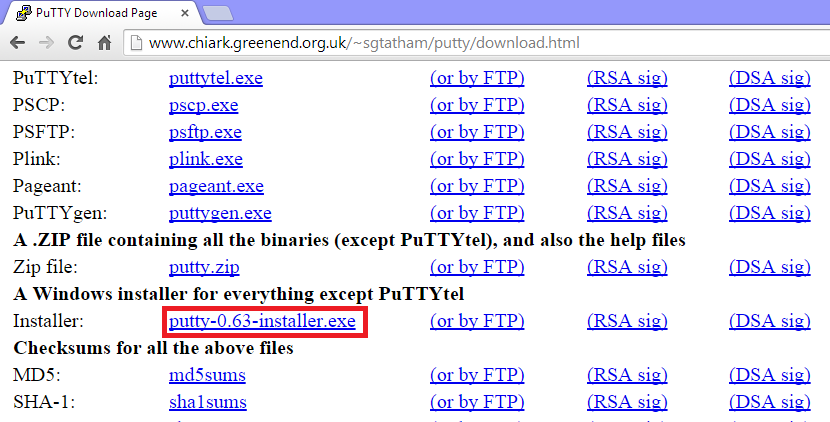
Once downloaded, run through the installer program to load all the putty programs onto your computer.
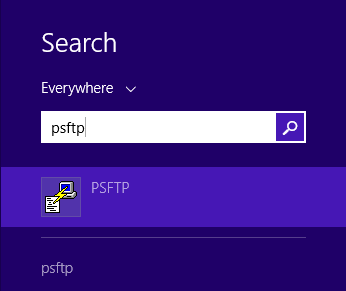
You should now be able to use the PSFTP program which you should be
able to locate by doing a search.
When started, PSFTP looks a little barren like this:

You'll first want to open up a connection to the mason server. If
it is your first time connecting, you'll likely be warned that you've
never connected before to which you should just answer y for
yes. Subsequent logins will not warn you.
Your username and password on mason are your GMU NetID (first part
of your Mason email) and password. Type them in when prompted. Note
that below the lines where you must type are highlighted in yellow but
when you are working the lines will likely not be highlighted.
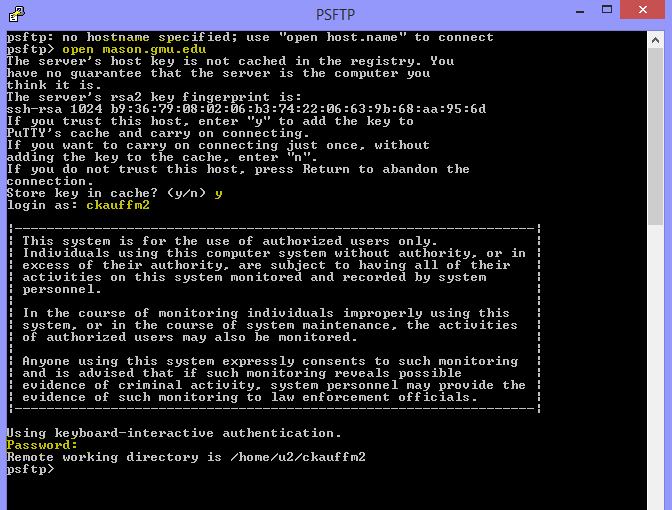
Note that as you type your password, no characters will appear on the screen so type carefully.
On successfully logging in you'll get a message about what the Remote Folder is.
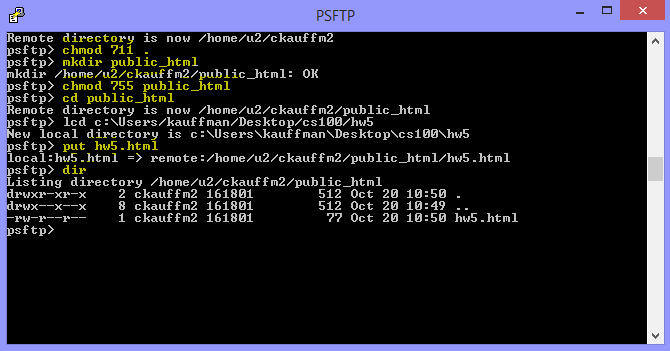
Once you have logged into mason, you'll need to run a series of
commands to move files from your local computer to the the remote
mason server. The picture below shows what I typed which will be
similar to what you'll need to type but not exactly the same as I
have my hw5.html file in a folder on my desktop that might be
different from where you put it and my user name is different than
yours, both on my local machine and on mason. Refer to the sftp
section for more details about what specifically to do. Note that the
example below does not completely set up your web page so make sure
the read the SFTP section to finish the process.
12 sftp On Mac OS X
Mac OS X comes with a built in SFTP tool so you don't need to get
any new programs. You will need to use the Terminal program to run
sftp though.
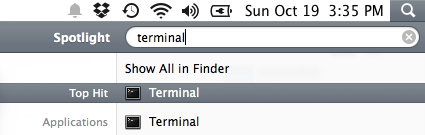
You can access the Terminal by searching for it using the OS X
search functionality. Every Mac has a terminal as OS X is a flavor of
unix under the hood.
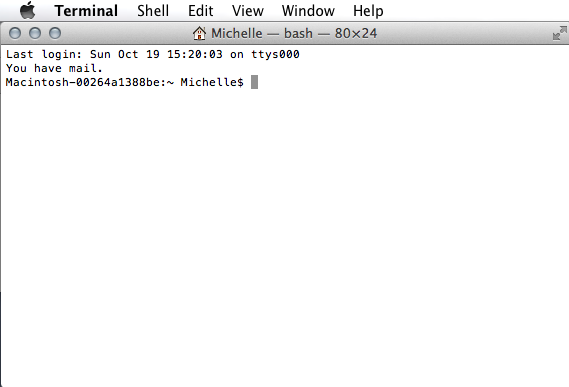
When started, the terminal looks similar to Python's interactive prompt.
Within, the terminal you'll use the sftp program to communicate with
the server. On starting, the program requires you to tell it what
server you are connecting to and what you username on the server is.
By username is ckauffm2 and I am connecting to the machine
mason.gmu.edu so I would start the sftp program as follows.

You will need to change your username to whatever your NetID is. If
it is your first time connecting to mason, you'll get a warning to
which you should just answer yes.
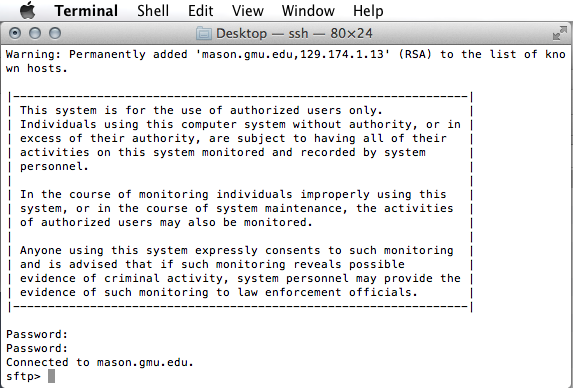
If all goes well you will be prompted for your password which is identical to your normal GMU password for Blackboard and email access. Type it in (but note that no characters will be shown on the screen).
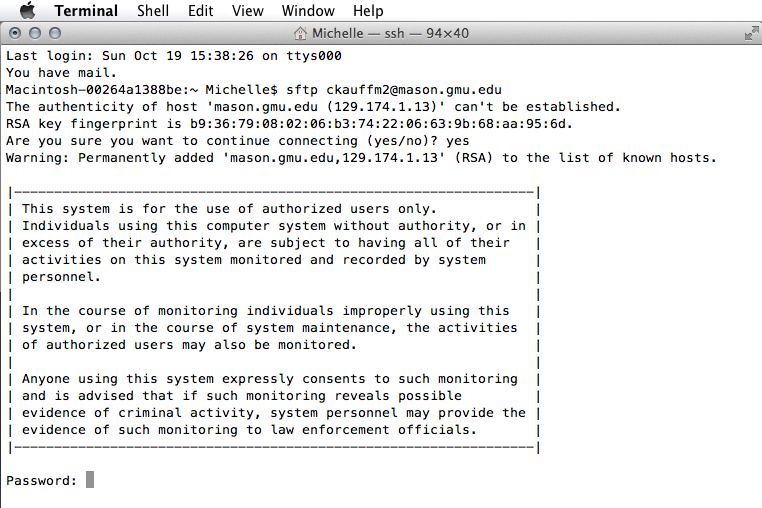
When started, sftp looks a little barren like this:
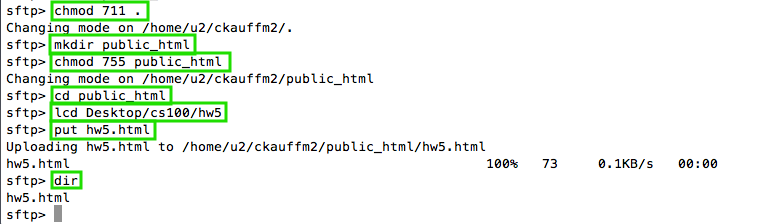
Once you have logged into mason, you'll need to run a series of
commands to move files from your local computer to the the remote
mason server. The picture below shows what I typed which will be
similar to what you'll need to type but not exactly the same as I
have my hw5.html file in a folder on my desktop that might be
different from where you put it and my user name is different than
yours, both on my local machine and on mason. Refer to the sftp
section for more details about what specifically to do. Note that the
example below does not completely set up your web page so make sure the
read the SFTP section to finish the process.
13 sftp Commands
Logging In
When logging into mason you'll need to log in using your username
and password at some point. These are your NetID (first part of your
mason email address) and your Mason password.
The address of the mason machine is mason.gmu.edu. On some
platforms (Windows), once you start SFTP (or PSFTP), you'll need to
ask to open the connection as in
open mason.gmu.edu
after which you will be prompted for your username and password.
On other platforms (Mac), just to start SFTP you'll need to specify both your username and the machine you are connecting to. For example:
lila [~]% sftp ckauffm2@mason.gmu.edu
^^^^^^^^^      ^^^^^^^  ^^^^^^^^^^^^^
PROMPT         USER     MACHINE
In the above example, the first PROMPT part is shown in the terminal
and does not matter much. I typed in the command sftp and instructed
the program my username on the server is ckauffm2 and the address of
the server is mason.gmu.edu. There is an @ (AT) sign in between
the username and machine address to get it to work right so the whole
commmand is
sftp ckauffm2@mason.gmu.edu
which looks a lot like an email address.
Remote and Local Folders
Once you are logged in, you can issue commands to the server to show you information. While operating in SFTP, the program will keep track of two folders
- Remote Folder
- The Remote Folder is where SFTP is looking on
the server machine. It is usually printed out on
first logging in but can always be shown using the
pwdcommand.lila [~]% sftp ckauffm2@mason.gmu.edu Password: Connected to mason.gmu.edu. sftp> pwd Remote working directory: /home/u2/ckauffm2
In the above, my initial remote folder is
/home/u2/ckauffm2which is my home directory on themasonserver. - Local Folder
- The Local Folder is where SFTP is looking on your
personal computer. The starting local folder
varies a lot from one system to the next but you
can use the
lpwdcommand to show you where you are at any given moment.On Windows, when I started
PSFTPand typelpwdpsftp> lpwd C:\Program Files (x86)\PuTTY
it show shows me the Local Folder on the next line. This local folder (
C:\Program Files
                   (x86)\PuTTY
) is where the PuTTY programs live and is not particularly useful for transfering data so we'll likely want to change it.On Mac OS X, when I started
sftpin the termainal and typed the commandlpwdsftp> lpwd /Users/home/kauffman
it shows me the Local Folder on the next line. This local folder (
/Users/home/kauffman) is my home directory on my personal laptop but I don't keep any of my coursework there so I'll want to change it.
You can change both the Remote Folder and the Local folder in SFTP by issuing the right set of commands. You can also create and remove directories in the Remote Folder. Below is an example of how to set up your web directory the first time.
Changing Permissions and Setting Up your Web Folder
Note: you only need to do the steps in this section once to set up your permissions and web directory. Once done, you can skip to the next section if you have an existing web page that you want to change.
Once you log in to mason, the first thing to do is change the
permission on your home directory to allow others to get into
subdirectories like your web directory. Changing the permissions is
done with the chmod command which takes the permissions to change to
and the file/folder to change. Permissions are screwy but the
following is the right command to issue.
chmod 711 .
Note the dot at the end which means "the current directory" which always starts as your home directory.
Next you'll want to create a web folder which on mason is always in
your home folder and is always called public_html. Making a
folder/directory is done using the command mkdir followed by the
name of the new folder.
mkdir public_html
This folder must have slightly different permissions to allow others
to read its contents. Use chmod again as in
chmod 755 public_html
Once the public_html folder is set up, anything that is put in it
will be served up over the web. For example if I put a file like
how-the-internet-works.txt in the public_html folder, then someone
can go to certain web address and find that file. Since my GMU
username is ckauffm2 and my files are on the mason server, the web
address to go to is
http://mason.gmu.edu/~ckauffm2/how-the-internet-works.txt. Note the
tilde (~) symbol which often is associated with user names on a
server.
If my user name were instead kauffman, the web address of the file
in my public_html folder would be
http://mason.gmu.edu/~kauffman/how-the-internet-works.txt but that's
not my username so you won't find anything at that address.
If I put another file like hw5.html in the public_html folder on
mason, I can find it at http://mason.gmu.edu/~kauffman/hw5.html. If
that web page has any pictures in in like chris.jpg, then I'll need
to put chris.jpg in the public_html folder on mason as well.
Getting Stuff on the Web
During an SFTP session, you'll need to change the Remote Folder to
public_html and then change the Local Folder to wherever your upload
files are located on your personal computer. You can then move files
from Local to Remote Folders.
Changing the Remote Directory to the the web directory is done using
the cd (change directory) command.
cd public_html
Now we're ready to put something onto the server in the Remote Directory but we'll need a file that is stored locally to put there. This requires changing the Local Folder to where something you want to upload is located.
On a windows system, you should have a folder on my desktop called
cs100 where you put things for class. For HW5, make a subfolder
called hw5. My user name on my windows system is kauffman but
chances are yours is different. The absolute path to my hw5 folder
is C:\Users\kauffman\Desktop\cs100\hw5. Note that my user name
kauffman appears in the path and your path may be slightly
different. Make changes if local your user name is different. Look
in the windows explorer location bar to make sure of the location of
your files. To get the SFTP Local Folder to be that folder, use the
lcd (local change directory) command as in
lcd C:\Users\kauffman\Desktop\cs100\hw5
On mac systems, you should have a similar folder setup (cs100 folder
on Desktop, hw5 folder in cs100). The absolute path to my hw5
folder is /Users/kauffman/Desktop/cs100/hw5 which again contains my
user name so make adjustments as needed. To get the SFTP set to that
folder use lcd as follows.
lcd /Users/kauffman/Desktop/cs100/hw5
In your hw5 folder should be the hw5.html file you created in
Problem 1. To put it on the server use the SFTP command put
followed by the file name as in
put hw5.html
which should copy hw5.html from the Local Folder to Remote Folder on
the server. You'll likely see a message confirming that the transfer
is happening like
local:hw5.html => remote:/home/u2/ckauffm2/public_html/hw5.html
or a progress meter like
hw5.html 100% 16KB 15.5KB/s 00:00
indicating the progress of the transfer.
You can check that the file has successfully uploaded by listing the
directory contents of the Remote Folder with the dir command.
sftp> dir
hw5.html
This shows that hw5.html is on the remote server.
Since you are using a picture of yourself, make sure to put your
picture on the server as as well. My picture is called chris.jpg so
I would do
put chris.jpg
and check that is there with dir again
sftp> dir
hw5.html
chris.jpg
Finally, the permissions on the files you upload must be set so that
they can be read by everyone. You can see the permissions of files on
the server using the command ls with an option to do a long listing,
that is the command ls -l which should give results like the
following.
sftp> ls -l
-rwx------    1 ckauffm2 161801        790 Oct 21 14:35 how-the-internet-works.html
-rwx------    1 ckauffm2 161801        315 Oct 21 14:35 how-the-internet-works.txt
-rwx------    1 ckauffm2 161801      15902 Oct 20 14:39 hw5.html
-rwx------    1 ckauffm2 161801      14015 Oct 21 14:35 penguin-car.jpg
The files are listed on the far right and permissions are on the far
left. Permissions can be a little tricky to read but they boil down
to varios folks having Read (r) Write (w) and Execute (x)
permissions. With the set of permissions above, only I (the file
owner) have permission to do anything with the files so if anyone
tries to visit the web page how-the-internet-works.html at the
address http://mason.gmu.edu/~ckauffm2/how-the-internet-works.html
they'll get a 403 Forbidden message as in
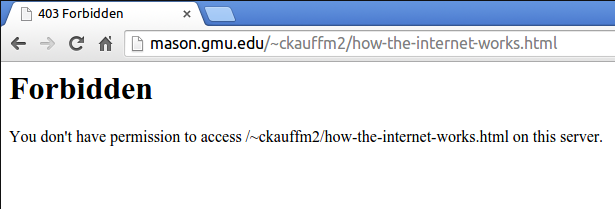
This is a very common error and is fixed by changing the permissions
of all the files using chmod 744 * as in
sftp> chmod 744 *
Changing mode on /home/u2/ckauffm2/public_html/how-the-internet-works.html
Changing mode on /home/u2/ckauffm2/public_html/how-the-internet-works.txt
Changing mode on /home/u2/ckauffm2/public_html/hw5.html
Changing mode on /home/u2/ckauffm2/public_html/penguin-car.jpg
SFTP responds that it is changing permissions on all the files because
we requested * (all files) be affected.
Checking the permssions again with ls -l gives more r (Read)
permissions for each file
sftp> ls -l
-rwxr--r--    1 ckauffm2 161801        790 Oct 21 14:35 how-the-internet-works.html
-rwxr--r--    1 ckauffm2 161801        315 Oct 21 14:35 how-the-internet-works.txt
-rwxr--r--    1 ckauffm2 161801      15902 Oct 20 14:39 hw5.html
-rwxr--r--    1 ckauffm2 161801      14015 Oct 21 14:35 penguin-car.jpg
and visiting http://mason.gmu.edu/~ckauffm2/how-the-internet-works.html we see it is now accessible

14 Problem 5: Transfer your Personal Web Page to the mason server
In order for the world to consume your new personal web page, follow
the instructions in Mac SFPT or Windows PSFT and the instructions in
SFTP commands to upload your personal web page and your pictures. Make
sure to set the permissions right and to name your page hw5.html.
Your personal web page should then be available to everyone on the web
using an address similar to
http://mason.gmu.edu/~ckauffm2/hw5.html
When grading, we will check to see that the page exists at an address similar to the above.
What to put in your HW Write-up
- Include a clickable web link to your personal web page.