
P A04-Texturing
- PA04 Super-low-res Me is due on Oct. 25, 2016, 11:59pm
- This assignment will help you deepen the understanding of the following topics
- texture mapping
- UV coordinates
- Structure of polyhedra
- Mesh unwrapping and unfolding
- Mesh Editing
Credit: This assignment is inspired by Eric Testroete's work on his "Papercraft Self Portrait - 2009"
Results from 2014: Super-low-res Me Results
Tools needed
- Utility knife
- Hot glue gun
- Digital camera
- Scotch tape
- Lots of cardboard (the thinner the better)
- Or, you can use thick card stock or matte photo paper that allows you to print the patterns directly
- Software tools (see details below)
- panoramic view or photoshop or gimp
- Meshlab
- MeshMixer
- UV map unwrapper
- polyhedron unfolder
What to submit
- All images that you created. Make sure that you name your images as follows
- Texture color map (cs451_pa04_color.jpg)
- An image rendered from the texture mapped head model (cs451_pa04_texture.jpg)
- An image of the cardboard head (cs451_pa04_cardboard.jpg)
- An image of you wearing the cardboard head (cs451_pa04_me.jpg)
- README.txt file in cs451-PA04 folder with the following information
- Tasks that you completed
- Tasks that you started but did not complete
- Tasks that you did not start
- What are the most challenging parts in the project?
- How to submit
- Submit all files listed above and README.txt in a zipped file named cs451_pa04_[your last name].zip
- Please do not send us the file directly
Tasks
- Task 1 (10%): Takes multiple pictures of your head (360 view) and combine them in a single image.
- You can simply tile the images if you like
- note Although this is the easiest way to get the head texture, it will require a lot of adjustment in your Task 3
- Alternatively, you can merge these images using panoramic software such as hugin
- note This approach requires you take many photos (>12) at a place with white background.
- If your phone is smart enough, http://unwrapyourface.tumblr.com/
- note I tried this but it seems to be difficult to get a good face panorama
- easiest You can use photoshop to manually create face panoramic photo, here is a tutorial https://www.youtube.com/watch?v=4-n5k6nE-gE
- You can simply tile the images if you like
- Task 2 (20%): Modify, simplify, clean your head model from PA 03. You will be using this head model in Task 3.
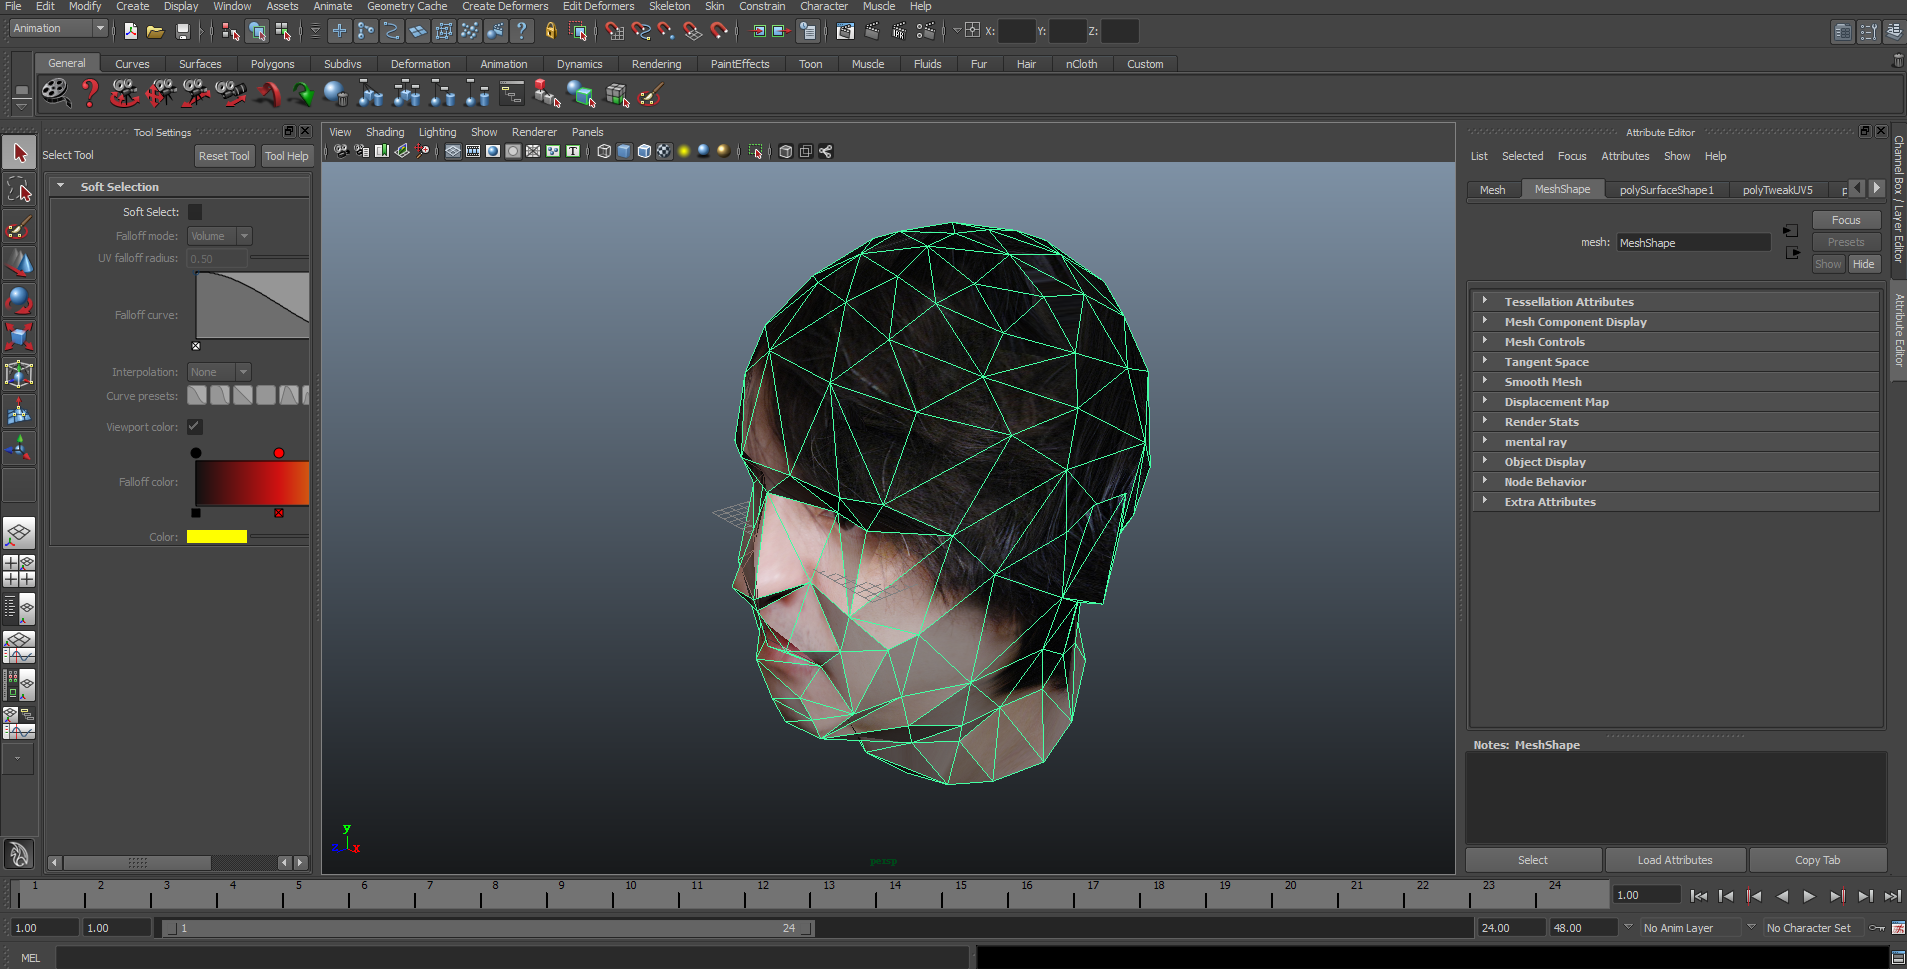
- Task 3 (30%): Texture map the 3D head model created in Task 2 using the image created in Task 1
- Use blender
- Use Maya (student version http://www.autodesk.com/education/free-software/maya)
- Use textool http://www.renderhjs.net/textools/
- Use other tools (not free):
- Task 4 (30%): Make a 3D wearable cardboard head
- Measure your head circumference and make it 1.5 larger
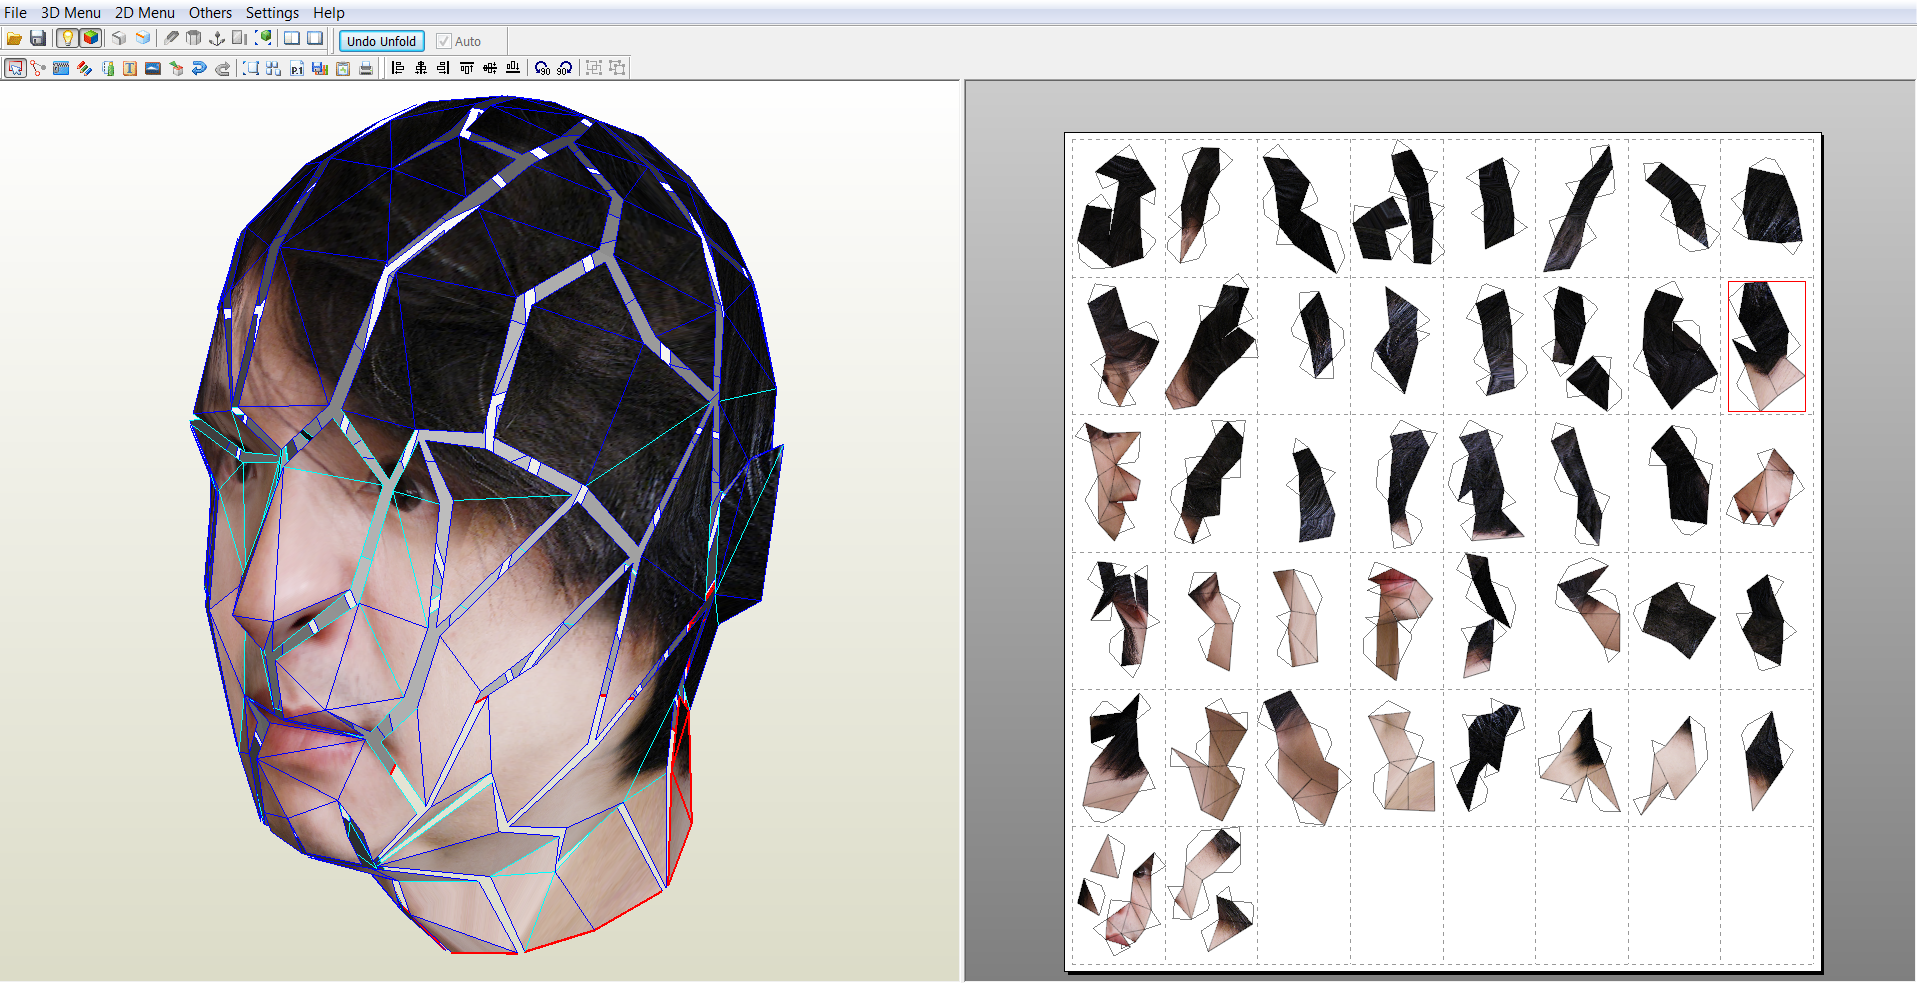
- Use this tool to unfold the model into 2D polygons (use Pepakura Designer instead, download the shareware version)
- Alternatively, you can also use Pepakura (not free) http://www.tamasoft.co.jp/pepakura-en/
- Print the unfolded model
- Glue the printouts to your cardboard
- Cut cardboard and assemble the head
- Take a picture of the cardboard head
- Task 5 (10%)
- Take a picture of you wearing the cardboard head
- Finish the README.txt file
- Bonus (5%)
- Take a video of you wearing the cardboard head performing ``trick or treating" on Oct 31 (Monday) evening
- Task 1 (10%): Takes multiple pictures of your head (360 view) and combine them in a single image.
Examples
- Create head texture (aka, face panorama)
- I have 7 head shots taken 45 degrees apart
- I use gimp to stitch the images together manually
- only use eraser and color intensity
- mostly just follow the youtube tutorial for photoshop (link above)

- Apply head texture in Maya
- use cylindrical UV project
- use "UV texture editor" to match mesh to the texture
- Use Pepakura to unfold the model
- I use 110 lb cardstock
- when print, use manual feed to avoid paper jam
Extra: Here are some awesome images by Bert Simons
