
TrackingHardware
Software
Mega PlanEtc. |
Main /
Gumstix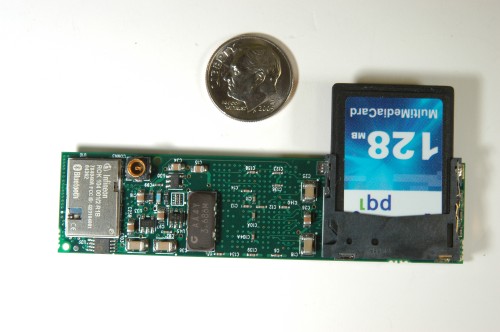 We use the Gumstix embedded computer for all our computations. Our Gumstix has the following specs:
The Gumstix attaches to a Waysmall buddy board via 60-pin Hirose connector. The Waysmall provides two serial ports, client USB, power, and GPIO pins. I2C is accessed through the GPIO pins. Getting the Gumstix up and running required several modifications to the filesystem. We modified a local copy of the Linux root filesystem, then re-flashed the Gumstix. See the Development section for information on how to download and setup the Gumstix buildroot on your local machine. LoginYou can login to the Gumstix in two ways: over the serial port, or over Bluetooth. Initially, you will have to login using the serial port, and after completing the configuration described here you should be able to login via Bluetooth. Using a serial port, you can login to the Gumstix from your local machine. If you do not have a serial port on your computer, then a USB to serial converter is needed. We found the Keyspan and Manhattan converters to work well. Depending on your local machine, you might also need a null-modem (and possibly a gender convertor or two). Using a program like kermit, Z-term, hypterterm, or minicom, create a serial connection between your computer and the ttyS0 port on the Waysmall computer. The ttyS0 port is the one closest to the power supply. By default, a getty is running on this port which allows you to login. Make sure the serial port settings are speed 115200, 1 stop bit, 8 bits, and no parity. Power the Gumstix and you should see the bootup messages from the Gumstix on your local machine. See the Gumstix Getting Started guide for more details. BluetoothAfter downloading the Gumstix buildroot, the first step is configuring Bluetooth, which requires several modifications to the Gumstix, and to a Belkin Bluetooth Access Point. Here are all the details. I2CThe Gumstix and Brainstem can communicate with one another via I2C, but not without modifications to both the Brainstem and the Gumstix. Here are the details how to modify the Brainstem for I2C. Getting I2C working on the Gumstix required the creation of a device driver Attach:brainstemi2c.tar.gz. Download the tar file, and place all the files into the the appropriate locations under
ext2fsThe MMC card must be reformatted to ext2fs. This filesystem implements user permissions and allows the Since the filesystem on the MMC card has changed, you must now compile ext2 support into the kernel. Goto
Final ConfigurationThe default configuration has a few problems:
Download this config script Attach:superconfig and place it in Build the Kernel and ModulesYou must first build the kernel in the proper format. Go to
On Mac OS X, you need to add Make the FilesystemTo build the root filesystem go to Re-flash the GumstixAfter you run Kermit Transfer After connecting your local machine to the Gumstix with serial cable, boot the Gumstix. When you see the U-boot countdown, press a key to interrupt it. Type
Now you need to replace the old filesystem image with the new one. Go back to the Gumstix and type:
Its very important that you type 2-31, otherwise you will erase the bootloader! MMC Card Transfer Using the MMC card is both easier and faster than using serial. A slightly different procedure is needed to transfer the new filesystem image. After copying
Directory StructureAlmost everything is stored on the MMC card, and then linked to the standard Linux directory structure on the Gumstix. We use a directory structure like:
Final ModificationsThere are few modifications you must make directly on the Gumstix. I2CYou will need to create (one time) a character device file with Major number 42 and Minor number 1:
e2fsckThe new filesystem on the MMC can become corrupted if the proper shutdown sequence is not followed. To fix any filesystem corruption we cross compiled e2fsck from the e2fsprogs package with the following configure options: #!/bin/tcsh
setenv CFLAGS "-D__ARM__ -D__uclinux__"
setenv TEMPHOST arm-linux
setenv CC ${TEMPHOST}-gcc
setenv AR ${TEMPHOST}-ar
setenv RANLIB ${TEMPHOST}-ranlib
setenv BUILD_GCC ${CC}
e2fsprogs-1.37/configure --host=${TEMPHOST} --build=yourlocalmachine-OS
The complete package does not build, however the e2fsck binary compiles correctly, and is located under Serial Port CommunicationJava and Python don't have native facilities for changing the ioctl of the serial port, making communication with the Brainstem and CMUCam2 problematic. Among other solutions, we have created a serial daemon which listens in on a socket and shoves everything it hears out a serial port (and vice versa). Thus a Java/Python program can talk out the serial port just by connecting to a socket with the daemon running. The serial daemon in binary and source (a single C file), plus instructions for use, can be found here: serialdaemon.1.tar.gz |