| <<< Construction 1
| Construction 3 >>>
|
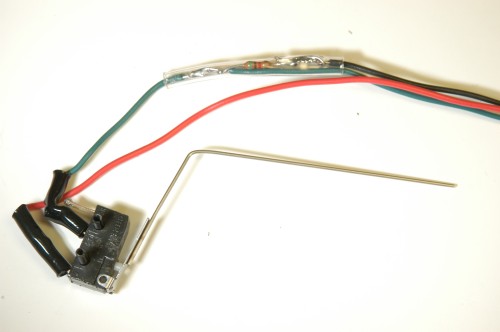
Gripper Well Bump Sensor
The contact on this bumper was bent so that it is parallel to the front of the bot when mounted on the lower platform. Wire up a bump sensor like this one with a resistor to ground from the outside contact point for a normally open switch. The middle contact is for power. More info on how to wire up the bump sensor.
Tip: With the Encoders, there is only room for one more digital input. If you need more than one bump sensor, plug this one into a remaining analog port on the Brainstem. Then simply check if it is greater than 1000 or so to see if it has been tripped. If you get really desperate, there are additional digital ins on the CMUCam2 camera.
| 
Larger/Higher Resolution Picture
|
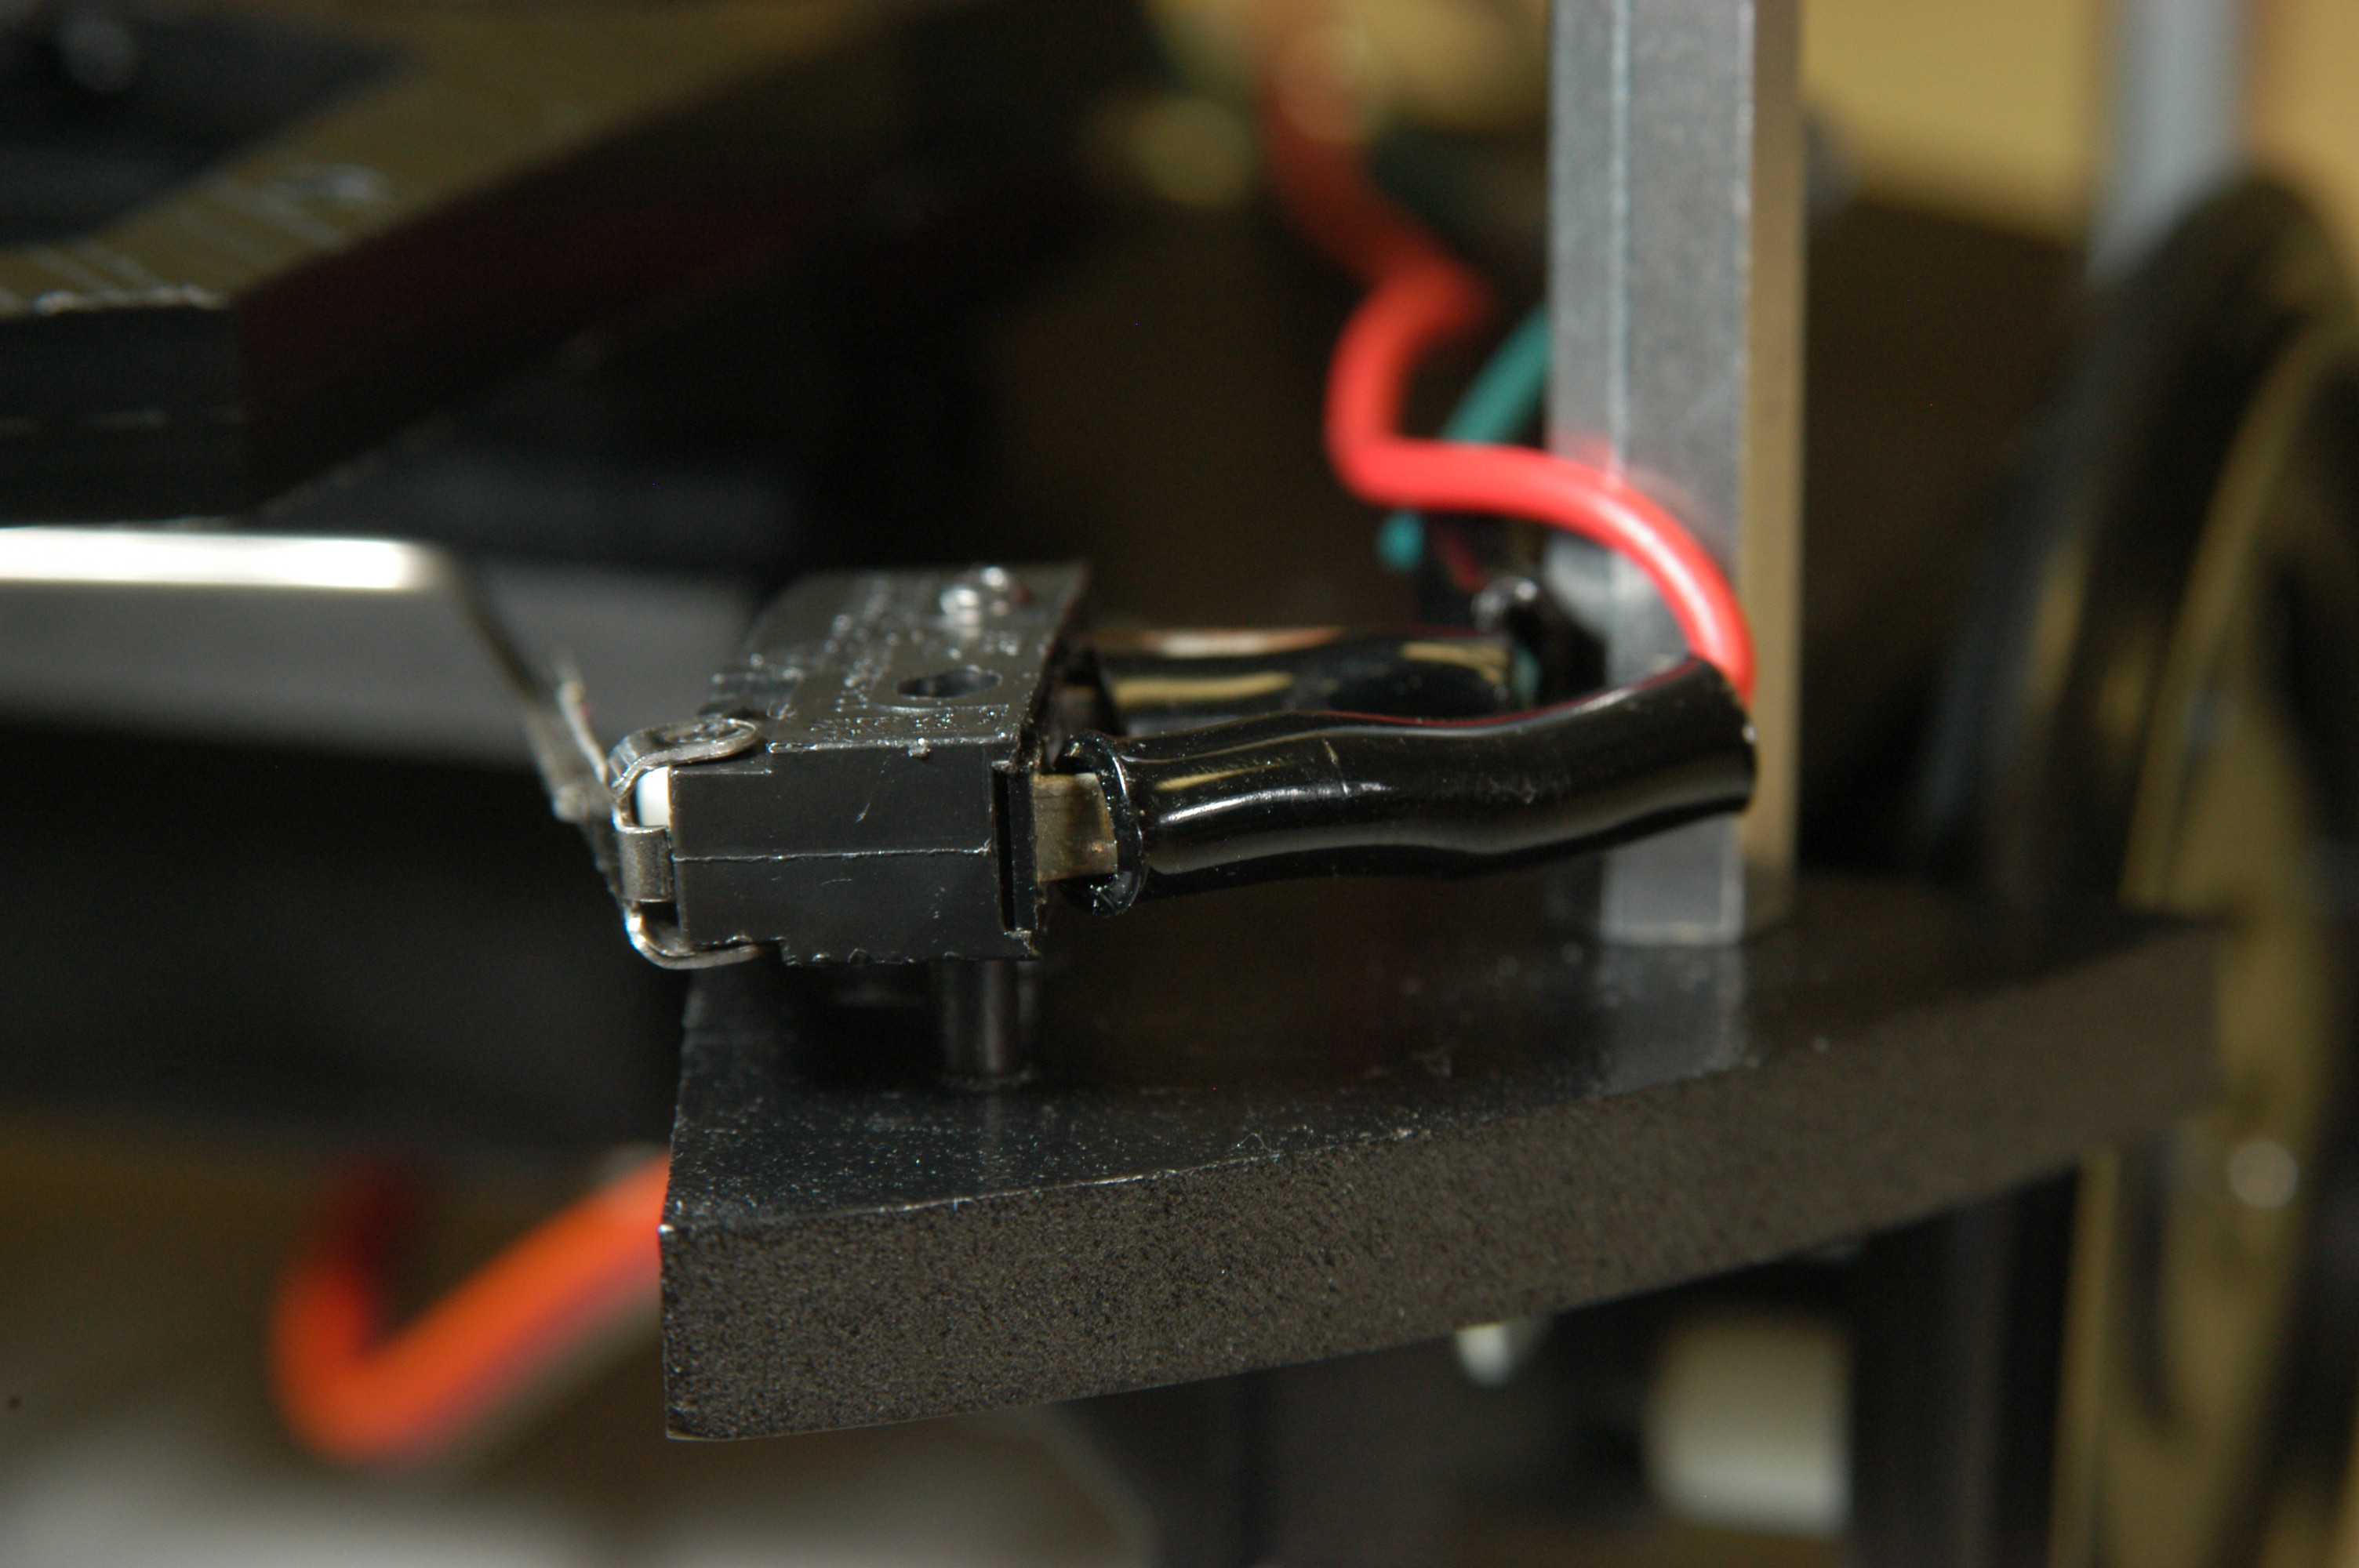
Attach Bump Sensor
We used tiny (3/32" x 1/2") metal compression pins to attach the bump sensor to the platform under the gripper as shown. In the picture at right, the sensor has not been slid entirely on the compression pins yet (eventually it's flush with the deck). If you have small screws, that works as well. Run the wires inside the riser to prevent snagging.
| 
Larger/Higher Resolution Picture
|
Battery
This is a 6-cell 5000 mAH NiMH battery pack. It provides 7.2 volts for the Main Processing System. Our batteries came with the wrong connectors, necessitating soldering new ones; make sure your battery comes with an Anderson Power Pole Connector! Velcro functions nicely for attaching it to the platform; this allows for easier swap-outs.
| 
Larger/Higher Resolution Picture
|
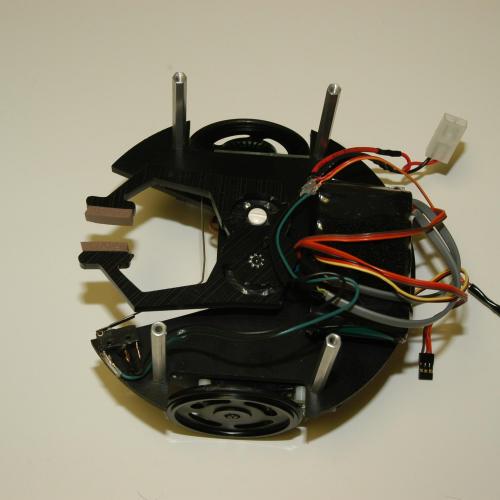
Lower Platform Completed.
Here is a view of the completed lower platform of the robot.
| 
Larger/Higher Resolution Picture
|
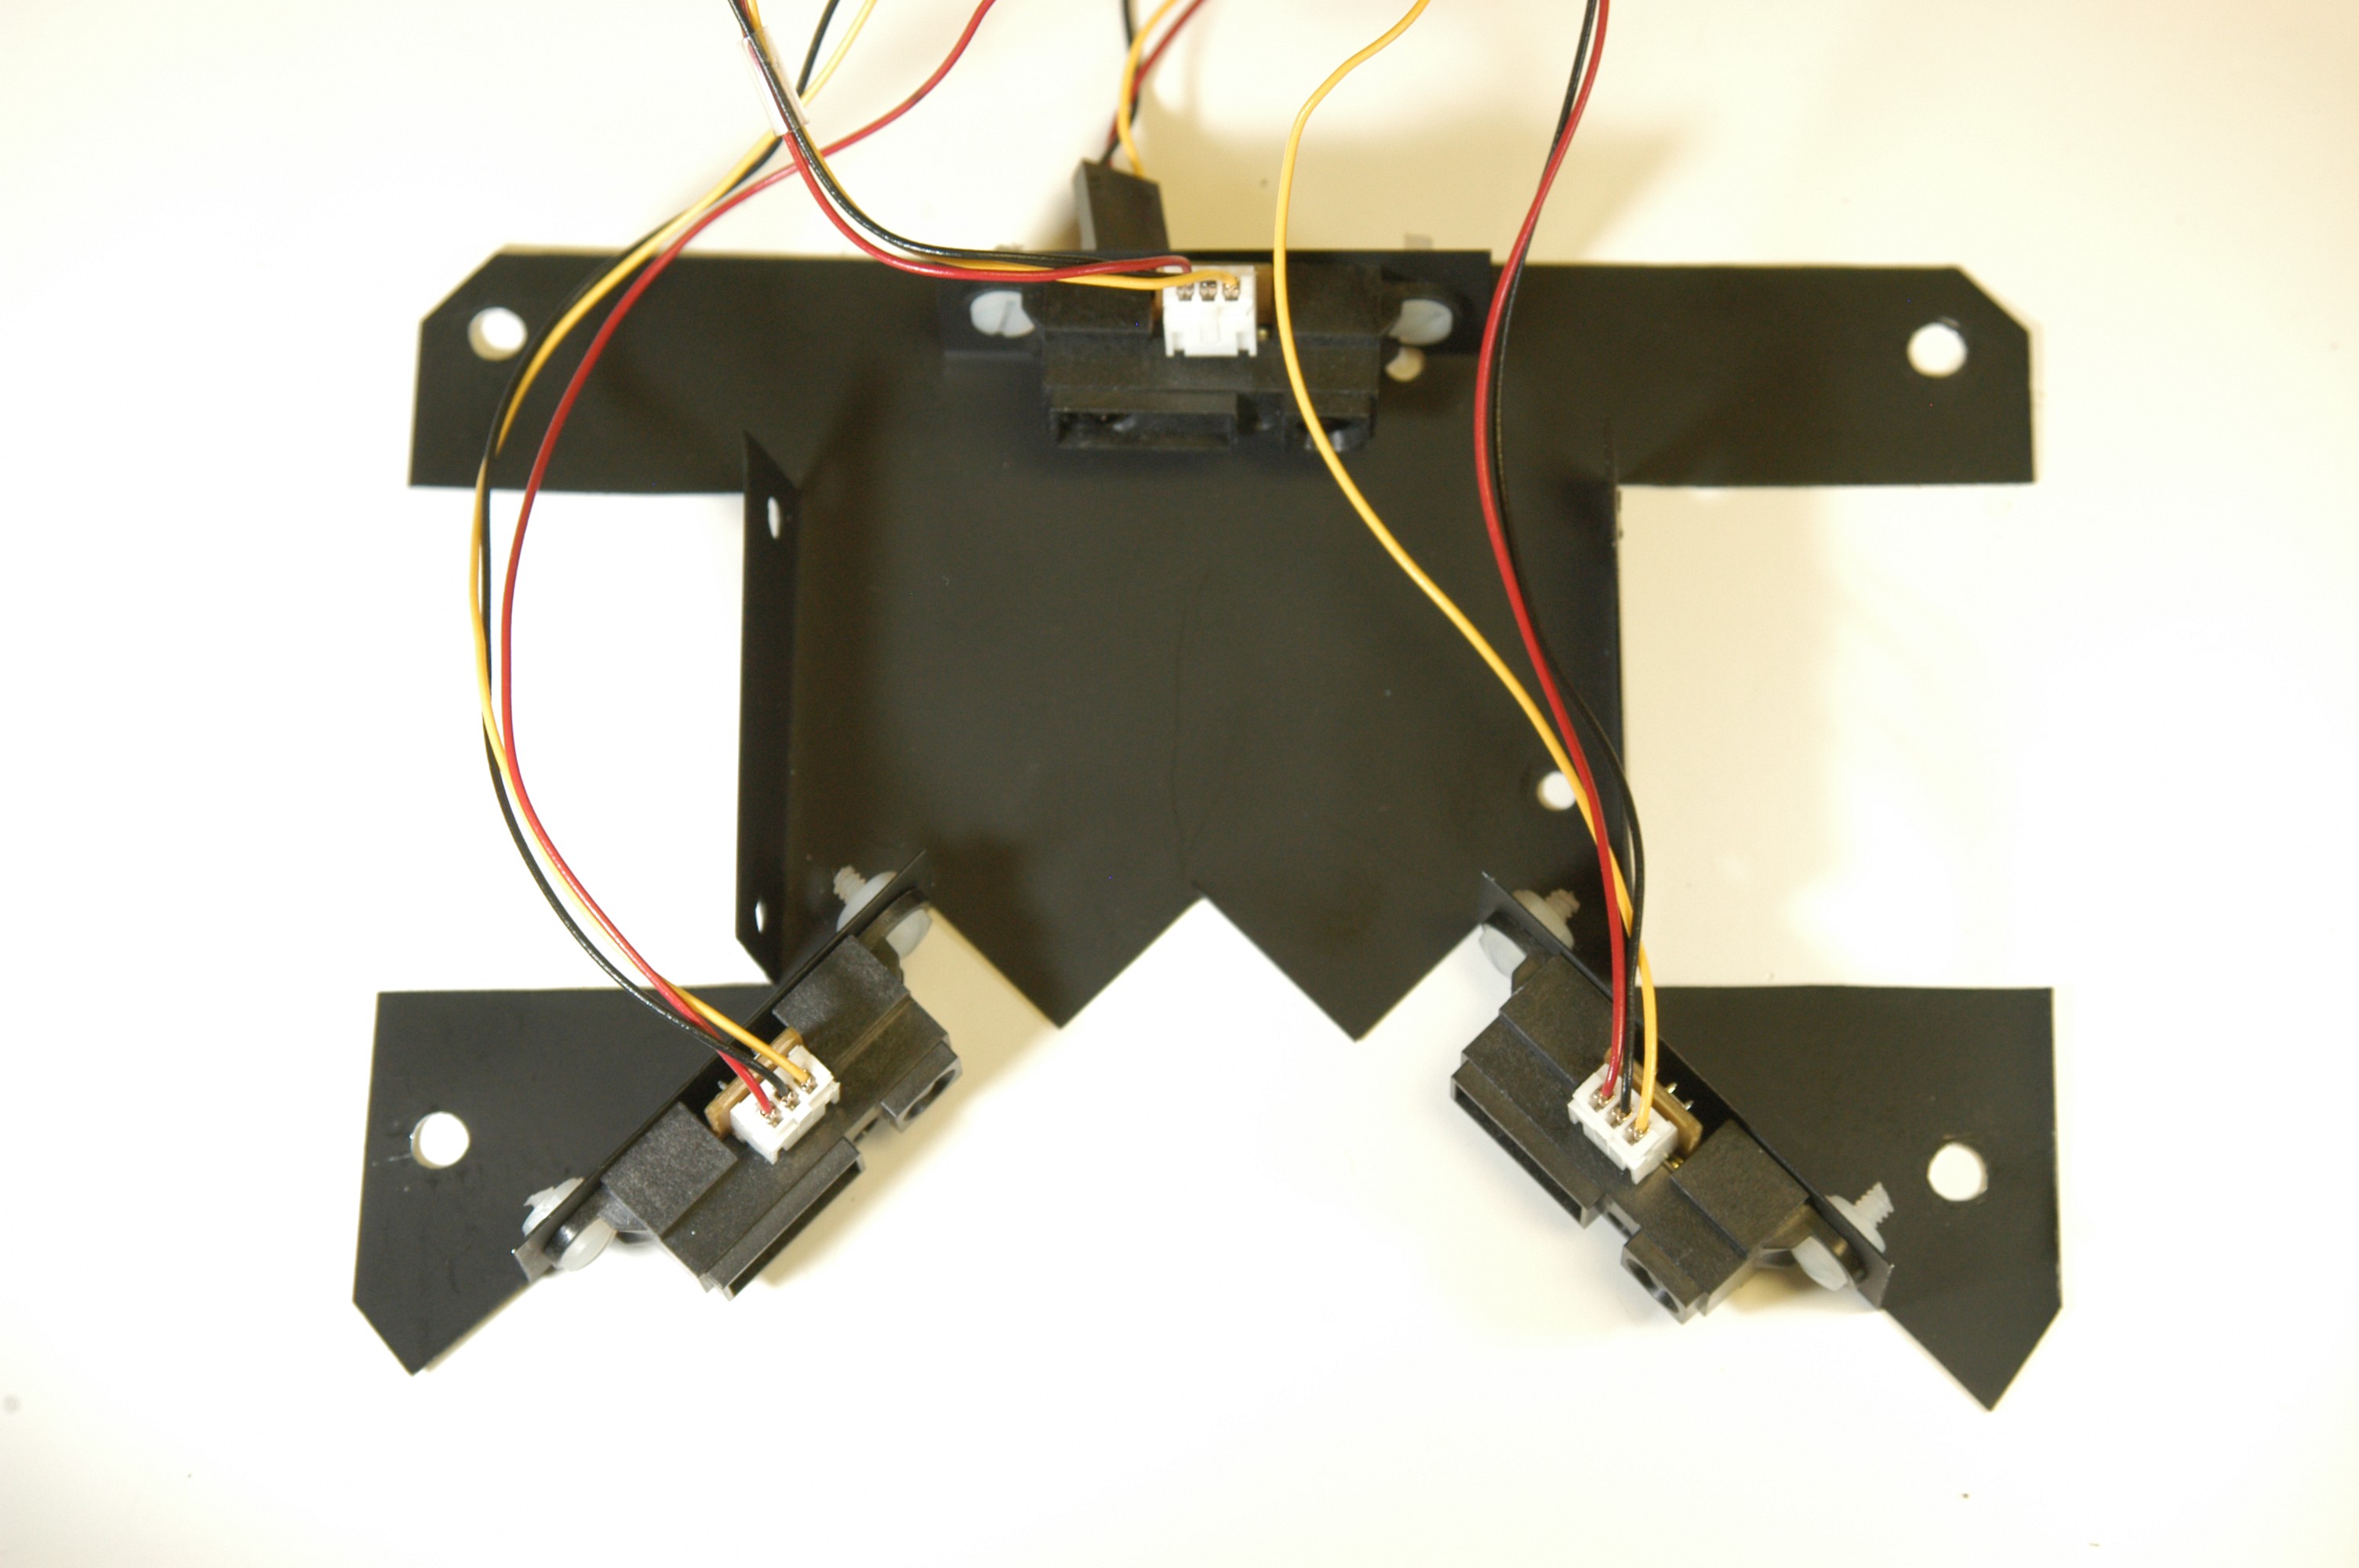
IR Sensor Bracket
This is an aluminum sensor bracket that mounts between the upper deck and the risers. The bracket can hold up to five Sharp IR range sensors: one pointing straight ahead, two pointing at 45 degrees, and two pointing at 90 degrees. See Sharp IR Sensors in the Hardware section for more information.
| 
Larger/Higher Resolution Picture
|
IR Sensor Bracket on Risers
This is how the sensor bracket will mount to the risers.
| 
Larger/Higher Resolution Picture
|
| <<< Construction 1
| Construction 3 >>>
|
